Custom Fan Shroud for the Electric Fan Conversion
(this is the first shroud I made - here is the second)
People argue about whether a fan shroud will help cooling; you can either trust me or every engineer who has dealt with fans. The Z has a fan shroud in the stock setup for a reason. Fans that are set in mid-air without any fan shroud are not working at full efficiency.
Well, with the Permacool fan you can't really use the original fan shroud...especially if you have all the other crap I have set up in the front of my car. So I decided I should build a fan shroud.
You will need extra directions for this one because I don't want to describe all the steps right now :)
I'm no pro with sheet metal, but that's what I used. I used some old, firm ducting material (in good condition). I made the shroud out of two peices, because one peice would be too hard to work with in that small spot. I cut out one half and put it over the radiator and fan and eyeballed the measurements. I then bent the material so the upper part would tuck into the top of the radiator (the metal at the top of the radiator folds over and leaves a good slot for the sheet metal to slide into).


After making the bend at the top, I put the metal back over the radiator, and eyeballed the circumfrence of the fan to cut out. DO NOT CUT OUT ANYTHING YET, though. I need to give an important direction later on. I purposely went short the first time, so I could get a more accurate view the second time. The second time I was right on. The opening in the metal is the perfect size for the outer edge of the fan blades. Before cutting out the circle, I marked a 1" section in several spots that are used to tie the shroud down to the reinforcement ring on the electric fan. Once marked, cut out the circle, BUT don't cut out the tabs...you want those there!!!!
After cutting out the circle, I then marked two holes where the bolts go into the radiator. You need to leave a little extra metal on the side in order to make this work. I will try to show you a rough template of what the shroud metal should look like when it is flat.
Then I did the other side exactly the same. Except I had to cut out a section for the lower radiator hose. I also didn't do a perfect job with the inner circle. The cut is smoother, but I left about 1cm too much metal (so it overlaps the edge of the fan blades). I did not make the shroud tuck into the bottom of the radiator because my fan is a little off centered. The bottom of the fan overlaps the bottom section of the radiator just a bit (oops!!!...that can't be good for cooling).


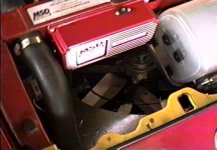
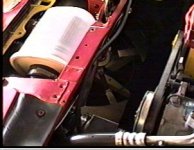
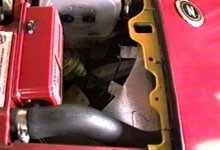
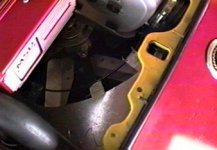
Then I took the two sections, fit the top edge into the radiator. Then I used the 4 bolts to bolt down the sides of the shroud to the radiator. I used some weather stripping under the sides to make a good seal. Then I drilled two holes at the edge of each tab and used zip strips to tie them down to the reinforcement ring. I drilled two holes at the joining section of the two parts to zip strip them together as well. The shroud is solid.
I tested the fan afterwards and the wind the fan makes in much more concentrated and seems to blow about twice as strong as before. The shroud directs all the air to one spot and I think cooling will be much better now. I still need to make something to protect the ignition control box.